


Z Offset Calibration: How to Get the First Layer Height Right on Any Printer

Marco Ellis
November 21, 2026
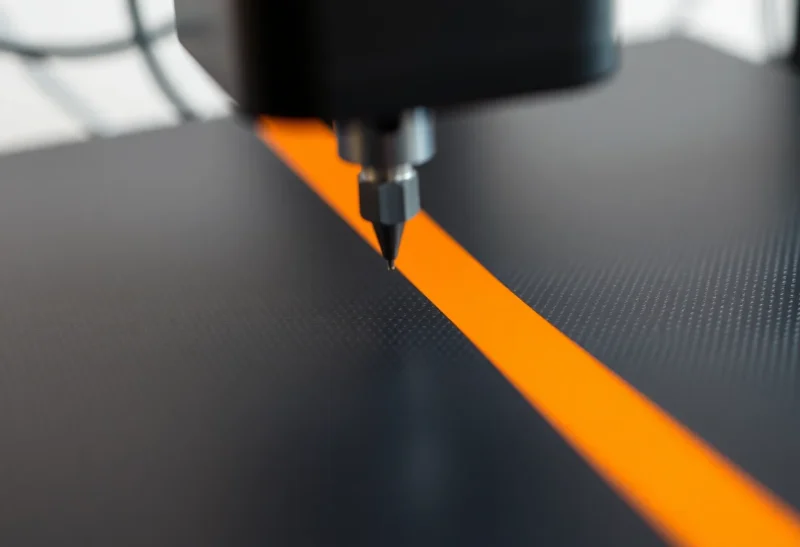
Your bed is leveled, the probe runs before every print, and the first layer still comes out wrong: thin round strands that peel off with a fingernail, or a translucent, scraped film with ridges plowed up between the lines. In both cases the mesh is usually fine. What is off is a single number that tells the printer how far the nozzle sits from the bed at the moment the probe says “touch.” That number is the Z offset, and getting it right takes a few minutes once you know where your printer keeps it.
Below: what the offset measures, how to read a first layer, and how to set and save it on Klipper, Marlin, Prusa, Bambu Lab and Creality machines, plus the slicer-side offset. If your problem is adhesion in general rather than nozzle height specifically, start with the checklist in First Layer Not Sticking to the Build Plate?, where nozzle height is one of nine checks.
What the Z offset measures: the gap between probe trigger and nozzle tip
An auto-leveling printer does not measure the nozzle directly in most designs. It measures with a probe, such as an inductive sensor, a BLTouch-style pin or a strain gauge, that sits beside the nozzle or under the bed. The probe triggers at some height, and the firmware needs to know how that trigger point relates to where the nozzle tip actually is. Klipper’s documentation defines its z_offset as the distance between the nozzle and the bed when the probe triggers. Marlin describes the same idea as the probe’s trigger height relative to the nozzle.
The mesh tells the printer the shape of the bed. The offset tells it where zero is. A perfect mesh with a wrong offset gives you a first layer that is uniformly too high or uniformly too low across the whole plate. If the first layer is bad everywhere in the same way, look at the offset. If it is good in one corner and bad in another, the problem is leveling, tramming or a warped plate.
Printers that probe with the nozzle itself, such as Prusa’s load-cell machines, remove most of this guesswork but still allow a small correction.
Reading the first layer: signs the nozzle is too high or too low
Before changing anything, look closely at a single-layer square or the first layer of a real print. Prusa’s knowledge base sums up the two failure modes simply: if the nozzle is too high the filament may not stick, and if it is too close the filament may not flow out, which can lead to a clog.
Too high
- Lines look round in cross-section, like spaghetti laid side by side.
- You can see gaps or the plate surface between adjacent lines.
- The layer peels off as loose strands rather than a single sheet.
- Corners and small features lift or drag around during the first few layers.
Too low
- The layer is very thin and translucent, sometimes with a rough, sandpaper-like texture.
- Ridges or waves of plastic pile up between lines where excess material had nowhere to go.
- Extrusion becomes weak or stops, and you may hear the extruder clicking.
- The bottom edges bulge outward, which is the classic elephant foot pattern.
About right
Lines are slightly flattened, they merge into each other with no visible gaps, and the top surface of the first layer feels smooth without being glassy-thin. When you peel it off, it comes away as one sheet. A good first layer is a little squished, not crushed.
The test print that makes adjustments easy to judge
A dedicated first-layer test makes adjustments much easier to judge. A single-layer square 50 to 100 mm across in the middle of the plate is quick to repeat. Five small squares in the corners and center also show whether the problem is the offset (all five the same) or the mesh (one or two different). Prusa’s First Layer Calibration on the MK3 family is a built-in version of the same idea.
Print it on the plate you actually use, at your normal bed temperature. Klipper’s documentation notes that probes can read differently hot versus cold and recommends calibrating at a consistent temperature. Work in small steps: changes of 0.02 to 0.05 mm are typical for fine-tuning. Make a change, let a few lines print, compare, repeat.
Klipper: PROBE_CALIBRATE, live babystepping and saving it
Klipper has two separate jobs: the initial calibration, and saving a fine adjustment you made during a print.
Initial calibration with PROBE_CALIBRATE
Per Klipper’s Probe Calibrate guide, the sequence is:
- Home the printer and move the head near the center of the bed.
- Run
PROBE_CALIBRATE. Klipper probes automatically, raises the head, moves the nozzle over the spot where the probe triggered, and starts a manual probe. - Use the paper test to bring the nozzle down. During the manual probe,
TESTZ Z=-0.1moves the nozzle down by 0.1 mm, and smaller values give finer steps. Stop when you feel slight drag on a sheet of paper. - Run
ACCEPTto record the position. - Run
SAVE_CONFIG, which writes the new value into your printer config and restarts Klipper.
If the nozzle does not land above the point where the probe triggered, the guide says to ABORT and fix the probe’s X/Y offsets first. It also warns that changing the hotend, the probe mount or anything in the motion system invalidates the result, as does changing bed tilt on printers whose probe sits off to the side of the nozzle. After recalibrating the probe, rerun BED_MESH_CALIBRATE, because the old mesh was built on the old offset.
Fine-tuning during a print
The paper test gets you close, not perfect. The fine adjustment happens on the first-layer test print. In Mainsail or Fluidd, the Z offset (babystep) buttons nudge the nozzle up or down while printing; from the console, SET_GCODE_OFFSET Z_ADJUST=-0.02 MOVE=1 does the same thing. This is a G-code offset, so it is temporary until you save it.
Saving the babystep
Klipper’s G-code reference describes Z_OFFSET_APPLY_PROBE as taking the current G-code offset (the babystep) and subtracting it from the probe’s z_offset. Run it after you are happy with the first layer, then run SAVE_CONFIG to make it permanent. Printers that home Z with a physical endstop instead of a probe use Z_OFFSET_APPLY_ENDSTOP, which adjusts the endstop position the same way. Since SAVE_CONFIG restarts Klipper, do it after the print.
Marlin: M851, babystepping and M500
Marlin stores the probe’s offset with M851. According to the Marlin documentation, most probes trigger below the nozzle, so their Z value is negative, for example M851 Z-1.2. A probe that triggers above the nozzle has a positive value. After setting it, save to EEPROM with M500, as the M851 page instructs.
For live tuning, Marlin uses babystepping through M290 or the LCD. When the firmware is built with BABYSTEP_ZPROBE_OFFSET, the Marlin docs say babystepping also changes the probe Z offset and the LCD menu item is relabeled “Babystep Z Probe Offset.” In that case you can tune during the first-layer print and then save with M500. If your build lacks that option, the babystep is lost when the print ends, so note the total adjustment and add it to M851 yourself.
Stock Marlin printers with a BLTouch or CR Touch usually show this as a “Z Offset” item on the screen; the menu location varies by manufacturer. One warning for every firmware: sign conventions differ. A Marlin value of -1.5 and a Klipper value of 1.5 can describe the same physical setup. Never copy someone else’s number; calibrate your own.
Prusa: Live Adjust Z on the MK3 family, load-cell machines after that
MK3, MK3S and other PINDA-probe printers
On these printers, Prusa’s First Layer Calibration routine prints a test pattern while you turn the knob. Afterward you can fine-tune from the LCD menu under Live adjust Z or by long-pressing the knob during the first layers. Prusa’s knowledge base explains that turning the knob counter-clockwise brings the nozzle closer (a more negative value), that typical values range from roughly -1.500 to -0.200, and that a positive value points to a sensor or alignment problem. It also notes that changes made while printing are saved. If you switch between steel sheets, Prusa recommends readjusting, since each sheet can need a different value.
MK4/S, MK3.9/S, XL and CORE One
These printers use a load cell, so the nozzle touches the bed to measure it. Prusa states that the first layer is calibrated automatically and that the old manual calibration is not needed. If you still want a little more or less squish, Prusa’s Live adjust Z article lists two options: long-press the knob during the first layer, which is not saved for the next print, or set a value in PrusaSlicer under Printer Settings, General, Z offset, where a negative value gives a more squished first layer. The slicer value only applies to G-code sliced with it.
If a load-cell Prusa produces consistently bad first layers, Prusa’s first check is whether the nozzle is seated at the correct height in the Nextruder, followed by the load-cell test in the Calibration menu. That is a hardware fix that no offset will compensate for.
Bambu Lab: automatic nozzle height, and what is left to adjust
Bambu Lab printers measure nozzle height automatically during leveling, and the A1 and P1 series offer no manual Z offset menu for everyday use. Bambu’s approach is that the printer handles it, and the usual fixes for a poor first layer are running bed leveling, cleaning the nozzle tip and plate, and making sure the plate type selected in the slicer matches the plate on the bed.
Newer models have more control. Bambu Lab’s wiki publishes a first-layer printing optimization guide for the H2 series that walks through small offset changes: if the first layer is too high, decrease the offset (the guide’s example goes from -0.02 to -0.03 mm); if too low, increase it. The H2S version gives per-plate defaults and keeps recommended adjustments within a few hundredths of a millimeter, and it warns that this is a workaround that can create new local defects, since lowering the nozzle to fix one high area pushes good areas too low. Before touching the offset, the wiki recommends re-running calibration and checking bed tramming. For the P2S, Bambu support staff have pointed users to a First Layer Quality Calibration option in the printer’s calibration menu on current firmware.
For A1 and P1 owners who still want an offset, OrcaSlicer has a Z offset field in its printer settings (see the next section). Some owners edit the machine start G-code instead, which is unofficial and can be overridden by the printer’s own calibration. If you are weighing the two slicers for this kind of control, see OrcaSlicer vs Bambu Studio.
Creality and other auto-leveling printers
Creality’s lineup splits into two groups. Older and budget machines with a CR Touch or BLTouch run Marlin-based firmware with a Z offset item on the screen, so the Marlin section above applies. Newer models add sensors that set the offset automatically: Creality says the Ender-3 V3 SE pairs a CR Touch for leveling with a strain sensor for auto Z offset. On those printers, run the auto-calibration first and treat any manual change as a small trim on top of it.
Many current printers from Creality, Elegoo, Sovol and others run Klipper under a custom touchscreen. If yours exposes Mainsail or Fluidd, the Klipper commands above work; otherwise use the on-screen Z offset control and check the manual for whether it saves.
The slicer Z offset: when to use it and the catches
OrcaSlicer, PrusaSlicer and some other slicers have a Z offset in printer settings. OrcaSlicer’s wiki explains that this value is added to every Z coordinate in the exported G-code. It does not change anything in the printer; it shifts the whole print up or down by the amount you enter.
That makes it useful when your printer has no firmware offset you can reach, when you want a different value for one plate or material without touching the saved one, or when you are testing a value before committing it to firmware.
The catches:
- It stacks. A slicer offset of -0.05 on top of a firmware offset you already tuned adds up. If you later recalibrate in firmware, remember to zero the slicer value, or the first layer will be off again.
- It travels with the G-code. A file sliced with an offset and sent to a different printer carries that offset with it.
- It cannot fix an uneven bed. It moves the whole layer. If only one area is wrong, go back to leveling.
When the offset keeps drifting
A correct offset should hold from print to print. If you find yourself adjusting it every few days, something physical is moving. Check these before tuning again:
- Loose probe or hotend. A probe mount screw or heater block that has backed off even slightly changes the trigger-to-nozzle distance.
- Nozzle swaps. Different nozzles, or the same nozzle tightened to a different depth, change the tip height. Recalibrate after every swap unless your printer measures with the nozzle itself.
- Plastic on the nozzle tip. On nozzle-probing printers, a blob of old filament on the tip makes the bed read high. Clean the tip with the hotend warm.
- Different plates. Smooth and textured sheets are rarely the same thickness. Use per-plate profiles or readjust when you switch.
Once the offset is stable, remaining first-layer issues are usually about temperature, plate cleanliness or speed, not height. Set it once, save it, and leave it alone until something on the printer changes.