


3D Print Layer Shift: Why Layers Slide Sideways and How to Fix It

Marco Ellis
November 21, 2026
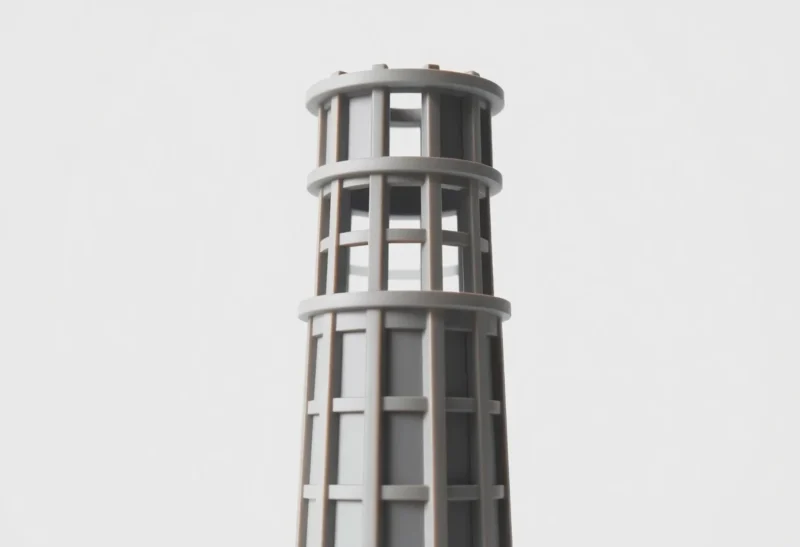
You come back to a print that looked fine an hour ago and find that everything above a certain height has slid a few millimeters to one side, like a stack of books someone bumped. The bottom half is perfect, the top half is perfect, and the two don’t line up. That is a layer shift, and unlike most print defects it almost never comes from slicer settings like temperature or flow. It comes from the printer losing track of where the nozzle is.
The good news is that a shifted print carries a lot of evidence. Which axis moved, how far, whether it happened once or several times, and whether it lands at the same height on every attempt all point to different causes. Read the failed part first, then fix the right thing.
How a printer loses its position
Most hobby printers drive the X and Y axes with stepper motors and timing belts, and they run open-loop: the controller sends a number of steps and assumes the motor completed them. Nothing checks the actual position during the print. If the motor skips steps because something resisted it, or the belt jumps a tooth on the pulley, or the pulley slips on the motor shaft, the controller does not know. It keeps printing as if the nozzle were where it should be, and every layer after that point is offset by the amount that was lost.
That is why a shift is permanent and abrupt. The printer does not drift back. Some newer machines watch motor load and can detect a skip, which is covered below, but the basic failure is the same on almost every printer.
Reading the failed print: which axis, how far, how often
Tell X from Y
Look at the part from above, or put it back on the plate in the orientation it printed. If the shift runs left to right, it happened on X. If it runs front to back, it happened on Y. A diagonal shift means both axes moved, which on a bed-slinger points to two separate problems, but on a CoreXY printer can come from a single belt, because both motors combine to move the head in X and Y. Note the direction before you pick up any tools: on a bed-slinger such as a Bambu Lab A1 or Prusa MK4, a Y shift points at the bed’s belt and motor, while an X shift points at the gantry.
One clean step or a staircase
- One shift, everything above it straight: a single event. The most common cause is a collision, where the nozzle caught on something, or a one-off snag.
- Several shifts in the same direction, like stairs: a recurring mechanical weakness, typically a loose pulley or belt that slips repeatedly under load.
- Shifts only on fast or large prints: the motion is asking more of the motors than they can deliver, so look at acceleration and speed.
Same height every time
If you reprint the model and it shifts at the same layer, the cause is in that layer, not in random wear. Open the sliced file in the preview and scrub to the shift height. Look for a sudden long travel move, a support transition, a section where the head crosses an area that could have curled, a filament change, or a feature where the nozzle starts hitting something. A shift tied to one height in one model is far more likely to be a collision or a G-code event than a belt problem.
Collisions: the nozzle hits the print
The single biggest cause of a one-off shift is the nozzle catching on the part itself. As overhangs and edges cool, they can curl upward. On the next layers the nozzle travels across that raised lip, and if the curl is stiff enough, the motor cannot push through it and skips. Blobs and zits, a support tower that tipped over, or a corner that started to lift from the plate do the same thing.
Signs it was a collision:
- Scuff marks, ridges or torn plastic on the top surface just below the shift.
- Curled overhangs, lifted corners or a visible blob near the shift line.
- The printer made a loud knock or click at some point.
- The shift happened at the same height on repeated attempts.
Fixes start with the curl. Better part cooling on overhangs, a lower print temperature within the filament’s range, and orienting the model so overhangs are less severe all help. If the curl comes from the part lifting off the plate, the causes and fixes in Why 3D Prints Warp and How to Stop the Corners Lifting apply directly.
Then reduce the chance of the nozzle meeting what is left:
- Z-hop on retraction. Lifting the nozzle before a travel move clears small curls and blobs. It is called Z-hop in OrcaSlicer and Bambu Studio, Lift Z in PrusaSlicer, and Z Hop When Retracted in Cura. It adds a little print time and can increase stringing.
- Avoid crossing walls. Settings such as “Avoid crossing walls” in OrcaSlicer and Bambu Studio, “Avoid crossing perimeters” in PrusaSlicer and Combing in Cura route travel moves around walls instead of over them.
- Check supports. Tall, thin support columns can tip over and get dragged. Tree supports or a wider support base often help.
A related case: if the entire part moved, including the first layers, the part was knocked loose from the plate rather than shifted. That is an adhesion problem; see First Layer Not Sticking to the Build Plate?
Belts, pulleys and grub screws
Prusa’s knowledge base puts it plainly: layer shifts are most often caused by wrong belt tension or pulleys that are not secure. Start here when the shifts are repeated or random rather than tied to one height.
Pulley grub screws
The toothed pulley on each motor shaft is held by one or two small set screws. If one backs off, the pulley slips on the shaft under load, the motor turns but the belt does not move with it, and you get a shift. Prusa’s crash-recovery guidance says one set screw must be firmly tightened over the flat part of the motor shaft. To check, power off the printer, hold the pulley and try to turn the motor shaft independently, or mark the pulley and shaft with a pen and see whether the marks separate after a print. Thread-locker on these screws is a common fix on printers where they keep loosening.
Belt tension
A loose belt can jump teeth on the pulley during fast direction changes. An over-tight belt is not better: Prusa notes it can cause irregular X and Y movement, and Bambu Lab’s wiki warns that overtightening the tensioning screws can cause damage without improving results. How you set tension depends on the printer:
- Bambu Lab X1 and P1 series: the belts are spring-tensioned. Bambu’s wiki procedure is to loosen the four belt-tensioner screws without removing them, move the toolhead back and forth so the springs settle, park it at the rear, and retighten. The wiki also recommends cleaning the carbon rods at the same time and rerunning the printer’s calibration afterward, since both change the motion system’s resonance.
- Bambu Lab error messages: some HMS codes flag belt tension directly, for example a warning that the resonance frequency of the X axis is low and the timing belt may be loose. Follow the linked wiki procedure for your model when you see one.
- Prusa CORE One: Prusa’s guide measures belt tension by its vibration frequency and gives target values per belt. It says to tighten both tensioner bolts evenly and alternately so the gantry stays square.
- Other printers: most have a thumbwheel or screw tensioner. A belt should be taut and twang slightly when plucked, not flap or sag. If your manufacturer publishes a frequency or deflection target, use it.
While you are there, look at the belt itself. Missing teeth, frayed edges, a belt rubbing on a flange, or debris packed into the pulley teeth all reduce grip. Prusa’s layer-shifting article adds that on CoreXY machines you should keep the gantry square when adjusting, because uneven tension between the two belts distorts motion.
Binding, friction and snagging cables
The motor has a limited amount of force. Anything that adds resistance along an axis uses up some of it, and at the wrong moment the remainder is not enough. With the printer powered off and the motors disabled, move each axis by hand through its full range. It should feel smooth and even. Look for:
- Tight spots: a point where the carriage drags, often caused by a dry or dirty rod or rail, a misaligned linear guide, or a bent rod.
- Wheels too tight: on V-slot printers, eccentric nuts set too tight make the carriage stiff.
- Cable drag: a wiring harness, filament tube or ribbon cable that catches on the frame or the print at certain positions. A bed-slinger’s bed cable can snag at one end of travel and cause Y shifts at the same position every time.
- Filament tension: a spool that binds on its holder, or a tangled spool, can tug the toolhead.
- Objects in the way: purge waste, a stray tool or a previous print sitting at the edge of the bed.
Clean and lubricate rods and rails only with what the manufacturer specifies, and keep lubricant off the belts, which can make them slip.

Speed and acceleration beyond what the motors can deliver
A stepper motor produces less torque the faster it spins, and high acceleration demands more torque at exactly those moments. Profiles copied from a faster printer, a top speed mode such as Bambu Lab’s Ludicrous, or a heavy bed moving at high acceleration can push an axis past its limit. The result is usually a shift on large prints with long, fast moves, or one that shows up only after you changed profiles.
To test, reprint the same model with acceleration and speed reduced, for example to the manufacturer’s default profile. If the shift disappears, you have your answer. Note that acceleration matters more than top speed for skipped steps, and that travel moves are often the fastest moves in the file. Many slicers set travel speed and acceleration separately from print speed, so check those values too. If you switch slicers or profiles, compare the machine limits carefully; OrcaSlicer vs Bambu Studio covers how profiles differ between the two.
Motor drivers, current and heat
If the mechanics are sound and speeds are reasonable, the electrical side is next. A stepper driver that gets too hot can reduce current or briefly shut down, which looks exactly like a mechanical skip. Signs include shifts that only appear after a print has been running for a long time, in a warm room or inside an enclosure where the electronics box gets hot, and a controller fan that is clogged or not spinning.
Checks, in order of risk:
- Make sure the electronics cooling fan runs and its vents are not blocked.
- Reseat the motor connectors with the printer off. A loose motor cable can cause intermittent skipping.
- Look for driver warnings. Klipper, for example, reports errors from TMC stepper drivers in its console when it detects a fault such as overheating.
- Only then consider changing motor current. On Klipper this is
run_currentin the driver section of the config; on Marlin it is a firmware setting or a potentiometer on older boards. More current means more heat in both motor and driver, so raise it in small steps and stay within the motor’s rating.
Turn the printer off and unplug it before touching connectors or boards, and do not open a power supply. See the safety disclaimer before doing electrical work on a printer.
What step-loss and crash detection can and cannot do
Some printers try to catch a skip and recover. Bambu Lab’s print options include “Auto-recovery from step loss” on supported models: when the motors detect a lost step, the printer rehomes the axes and returns to the position before the shift. Bambu’s wiki warns that at high speed the motor load is large enough that the printer may detect step loss when there is none, and recommends turning the option off if you print at accelerations close to the printer’s limit. Prusa printers have crash detection, which Prusa notes is not available in Stealth mode.
These features save many prints, but they do not fix the cause. If the nozzle keeps hitting a curled overhang, the printer may recover and then hit it again on the next layer. Treat a recovery event as a warning, and still work through the causes above.
Matching the shift pattern to the likely cause
| What you see | Most likely cause | Check first |
|---|---|---|
| One shift, scuffs or curl below it | Nozzle collision | Overhang cooling, Z-hop, warping |
| Same height on every reprint | Model or G-code event at that layer | Slicer preview at the shift height |
| Staircase of shifts, one axis | Slipping pulley or loose belt | Grub screws, belt tension |
| Y only, same bed position | Bed cable or obstruction | Cable routing, hand-move the bed |
| Only on fast or large prints | Acceleration too high | Reprint with default profile |
| Only late in long prints or when warm | Driver overheating | Electronics fan, driver warnings |
| Whole part moved, first layer included | Part detached from plate | Bed adhesion |
Change one thing at a time and reprint the same model, so that when the shift stops you know which fix did it.