


How to Print TPU: Settings, Speeds and Which Printers Handle Flexible Filament

Lina Reyes
November 20, 2026
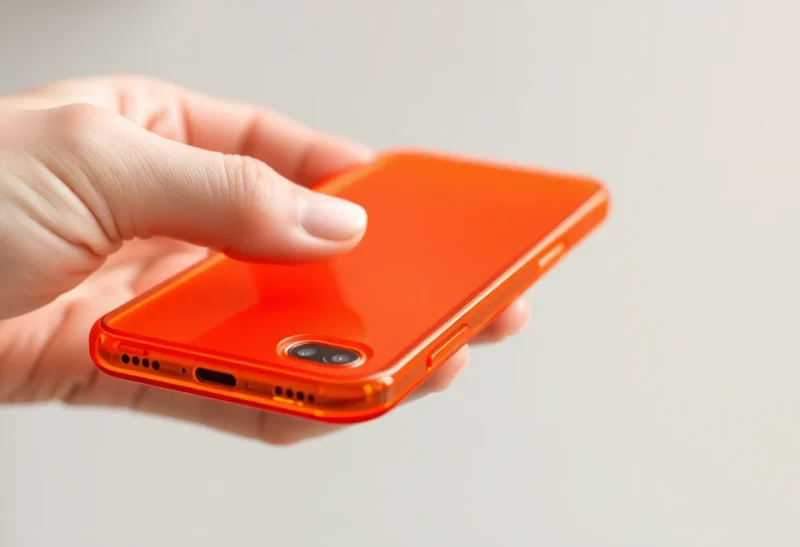
You want to print a phone case, a gasket, a set of bumpers or a watch strap, so you bought a spool of TPU. Then you read the warnings: flexible filament jams, tangles in the extruder, strings everywhere and will not feed through a multi-material system. Some of that is true, but it depends heavily on which TPU you have and which printer you are feeding it into. A 95A TPU on a modern direct-drive printer can be close to routine. A very soft TPU on a long Bowden tube is a different story.
This guide walks through TPU printing in the order you will hit each step: choosing a hardness, checking your hardware, drying, loading, slicer settings, the build plate and removing the part. The settings come from Bambu Lab, Polymaker and Prusa documentation, with the specific limits for Bambu Lab’s A1, P1S and P2S and their AMS units.
Step 1: Read the Shore hardness on the spool
TPU (thermoplastic polyurethane) is sold by Shore hardness, a number followed by a letter. The letter is the test scale and the number is the hardness on that scale. Bambu Lab’s wiki explains that a lower number means a softer material, and that flexible TPU usually uses the Shore A scale. Harder grades are measured on the Shore D scale. Bambu Lab lists common grades from hardest to softest as roughly 77D, 70D, 68D, 55D, 95A, 90A, 85A, 83A, 80A, 75A and 70A.
What that means for printing:
- 95A is the common starting point. It bends and squashes but is firm enough to push through an extruder without much trouble. Most “TPU” on store shelves is 95A, including Bambu Lab’s TPU 95A HF and Polymaker’s PolyFlex TPU95.
- 85A to 90A is noticeably softer, closer to a rubber band. It is harder to feed because it compresses and buckles when pushed. Prusa’s knowledge base puts it simply: the softer the filament, the harder it is to print.
- 68D, as in Bambu Lab’s TPU for AMS, is on the harder scale. It is far stiffer than 95A, closer to a tough, slightly bendy plastic than a rubber. That stiffness is what lets it feed through an AMS, at the cost of much less flex in the finished part.
Pick the hardness for the part: 95A for bumpers, cases, feet and tires; softer grades for grips and seals if your printer can handle them; 68D when you need TPU’s toughness in multicolor prints.
Step 2: Check that your extruder and printer can feed it
Feeding is where TPU prints fail. Soft filament behaves like a wet noodle: push it through a long, loose path and it compresses, kinks or wraps around the drive gear instead of going into the hotend.
Direct drive versus Bowden
On a direct-drive printer, the extruder gears sit right above the hotend, so the filament only travels a short, constrained distance after being gripped. On a Bowden printer, the extruder pushes the filament through a long PTFE tube to the hotend, and soft TPU can compress inside that tube. Polymaker’s wiki for PolyFlex TPU95 highly recommends a direct-drive printer and notes that the larger the gap between extruder and hotend, the slower you need to print. Bowden printers can often handle 95A slowly, but softer grades are a struggle.
Prusa’s knowledge base adds a tip for any extruder: loosen the idler so the gears push the filament gently rather than crushing it. On the Prusa Core One+ and Core One L, a latch on the side filament sensor case changes the lever tension for loading.
Bambu Lab printers by TPU grade
Bambu Lab’s TPU printing guide lists which of its TPU grades each printer family supports:
- H2, X and P series (including the P1S and P2S): TPU 85A, TPU 90A, TPU 95A HF and TPU for AMS.
- A1 series (A1 and A1 mini): TPU 90A, TPU 95A HF and TPU for AMS, but not TPU 85A.
- TPU 75A is a 2.85 mm filament that needs a dedicated hotend, and Bambu Lab lists it only for the H3C.
The same guide recommends a new nozzle or a cold pull before printing TPU, and advises against a nozzle that has printed carbon-fiber or glass-fiber filament because leftover fibers increase extrusion resistance. It rates 0.2 mm nozzles as unusable with all Bambu TPU grades; TPU 95A HF is supported on 0.4, 0.6 and 0.8 mm standard nozzles. For the P-series and other enclosed models, Bambu Lab offers an optional TPU Feeding Assist Module that reduces feeding resistance and allows printing with the enclosure closed.
If you are still choosing between Bambu’s open-frame models, our A1 vs A1 mini comparison covers the other differences. For the enclosed machines, see P2S vs P1S.
Step 3: Decide how the filament reaches the printer (AMS or external spool)
This is the question most Bambu Lab owners search for, and Bambu Lab’s compatibility table answers it clearly. Only TPU for AMS (68D) can be fed by the regular automatic feeding in any AMS: the original AMS, AMS lite, AMS 2 Pro and AMS HT.
For TPU 95A HF, 90A and 85A:
- AMS, AMS lite and AMS 2 Pro: not usable. Load the spool on the external spool holder instead.
- AMS HT: do not use its automatic feeding or regular outlet. Bambu Lab says to use it only as a sealed, dry container and feed the filament through the separate TPU outlet on the back.
On an A1 or A1 mini with an AMS lite, that means printing 95A from the external spool, not from the AMS lite slots. On a P1S or P2S with an AMS 2 Pro, the same applies. Bambu Lab’s wiki also suggests keeping the spool in a sealed container with low feeding resistance and raising the container so the slack filament does not drag on the bed or nozzle.
Step 4: Dry the spool before the first print
TPU absorbs moisture readily. Bambu Lab’s wiki calls TPU highly hygroscopic and lists the results of printing it wet: stringing, rough surfaces, bubbles, poor layer bonding and failed prints. Its storage advice is a sealed container with effective desiccant below 20% relative humidity.
Bambu Lab’s datasheets for TPU 95A HF and TPU for AMS recommend drying at 70°C for 8 hours in a forced-air drying oven, and Polymaker’s wiki gives the same 70°C for 8 hours for PolyFlex TPU95. Bambu Lab’s wiki notes that the AMS 2 Pro’s maximum drying temperature is 65°C, which is lower than recommended for TPU, so it may not dry completely; it suggests the AMS HT, the heatbed of an enclosed printer or a convection oven instead. TPU spools can also widen slightly when heated, and Bambu Lab suggests placing a heat-resistant weight on the spool when drying on the bed.
A short safety note: Bambu Lab’s datasheets warn that kitchen ovens and microwaves are not suitable for drying filament, because uneven heat can damage the spool and filament. Use a dedicated dryer or forced-air oven, keep it clear of other materials and do not leave it unattended. See our safety disclaimer. For temperatures across other materials and a comparison of dryers, see how to dry filament.
Step 5: Set temperature, speed and retraction
The table below collects the manufacturer guidance. Treat it as a starting range and check your own spool’s label, because TPU blends vary more than PLA.
| Setting | Bambu TPU 95A HF | Bambu TPU for AMS (68D) | Polymaker PolyFlex TPU95 | Prusa (general flex guidance) |
|---|---|---|---|---|
| Nozzle temperature | 220–240°C | 220–240°C | 210–230°C | 230–245°C |
| Bed temperature | 30–35°C | 30–35°C | 25–60°C | 60–75°C |
| Print speed | Under 200 mm/s | Up to 250 mm/s | 30–50 mm/s | About 20 mm/s, max 30–40 mm/s |
| Retraction | 0.8–1.4 mm at 20–40 mm/s | 0.8–1.4 mm at 20–40 mm/s | 3–6 mm at 40–60 mm/s | Low, or start with none |
| Part cooling fan | On | On | On | Off |
| Bed preparation | Glue | Glue, textured or smooth PEI | PC or textured PEI, glue when needed | Glue stick as separator on smooth sheets |
Sources: Bambu Lab technical data sheets, Polymaker wiki, Prusa knowledge base article on flexible materials. The Prusa column is generic guidance for flexible filaments on Prusa printers rather than a single product, which explains its higher bed temperature and lower speed.
Max volumetric speed is the setting that matters
The speed figure that actually limits TPU is how much plastic the hotend can melt and push per second, set as Max volumetric speed in the filament settings of Bambu Studio, OrcaSlicer and PrusaSlicer. The slicer slows any move that would exceed it, whatever print speed you set. Bambu Lab’s store page compares its two 95A filaments at 230°C: TPU 95A HF is rated at 12 mm³/s and standard TPU 95A at 3.6 mm³/s, which works out to roughly 147 mm/s versus 44 mm/s of print speed on their test model. That is where the “3x faster” claim for the HF version comes from.
You can check the arithmetic yourself: print speed equals volumetric speed divided by layer height times line width. At a 0.2 mm layer and a 0.42 mm line, 3.6 mm³/s gives about 43 mm/s. If you use a generic TPU profile with an unknown filament, start with a low volumetric limit and raise it only after a successful print. Cura has no direct volumetric limit, so control speed with the print speed settings instead.
Go easy on retraction
Retraction pulls filament backward to stop oozing, but soft filament stretches and compresses instead of moving cleanly, and repeated pulls can deform it in the extruder. Prusa’s knowledge base says lower retraction reduces the risk of clogs and tangling, and suggests turning retraction off, then raising it gradually while watching the results. Bambu Lab’s wiki suggests changing retraction distance in 0.2 mm steps: lower it if you see small holes on the surface, raise it if oozing is severe. For stringing that will not go away, dry the filament first; our stringing guide covers the order of fixes.
Bambu Lab’s wiki also recommends printing multiple objects with the “By object” sequence instead of “By layer”, to cut down on travel moves between parts that cause strings.
Step 6: Prepare the build plate, and know which one to avoid
TPU sticks to most surfaces easily. The challenge is usually getting it off without damage. Bambu Lab’s wiki states that TPU adheres strongly to the build plate, so parts with a large bottom surface can be hard to remove.
- Do not use the Bambu Lab Cool Plate SuperTack with TPU. Bambu Lab’s TPU guide says this directly, and the TPU 95A HF product page lists it as not compatible. Every other Bambu build plate can be used.
- Use glue as a release layer on smooth PEI. Bambu Lab’s datasheets list glue as the bed preparation for its TPU grades. Prusa’s knowledge base explains why: very soft flexible filament can bond to smooth PEI too strongly, so a layer of glue stick acts as a separator to protect the surface. Prusa says its textured powder-coated sheet does not need a separation layer.
- Keep the bed cool. Bambu Lab’s datasheets list a bed temperature of only 30–35°C for its TPU.
To remove a stubborn part, Bambu Lab suggests lifting one corner to make a small gap, spraying alcohol into it and gradually working the part free rather than forcing it. The same trick works for separating TPU from support material. On that point, Bambu Lab recommends PLA rather than TPU as the support material for TPU parts (except with TPU for AMS), because TPU supports tend to string, collapse and bond too well to the part.
Step 7: Shape the part for flexibility
How flexible a TPU part feels depends almost as much on the slicer as on the filament. Prusa’s knowledge base notes that more perimeters and more infill make the part stronger and stiffer, while fewer perimeters and fewer top and bottom layers keep it more flexible. A 95A part with 100% infill can feel nearly rigid; the same part with two walls and low infill will squish easily.
For a first test, print something small and simple with your manufacturer’s profile, such as a short tube or a flat strap. If it feeds and prints cleanly, increase size and speed from there. If it fails, the order to check is feeding path, dryness, nozzle condition and then volumetric speed, in that sequence. Most TPU failures come from the first two.
Quick answers for the A1, P1S and P2S
- Bambu A1 or A1 mini: use TPU 90A, TPU 95A HF or TPU for AMS. Feed 90A and 95A HF from the external spool, not the AMS lite. TPU 85A is not supported on the A1 series.
- Bambu P1S or P2S: TPU 85A, 90A, 95A HF and TPU for AMS are all supported. Use the external spool for everything except TPU for AMS, or the TPU outlet on an AMS HT. The optional TPU Feeding Assist Module is designed for these printers.
- Any Bambu printer with an AMS or AMS 2 Pro: only TPU for AMS goes through automatic feeding.
- All of them: dry the spool, avoid the Cool Plate SuperTack, use a clean 0.4 mm or larger nozzle and start from the system filament profile.